Account, workspace & billing
Update your workspace details, invite your team, and manage your subscription.
All of your account configuration lives under Settings in the left sidebar. The settings rail gives you quick access to sub-sections: Profile, Workspace, Offices, Team, Privacy, Public URL, API tokens, and Webhooks. Billing has its own dedicated page.
Update your workspace name and branding
Your workspace name and public-facing contact details are set in Workspace settings.
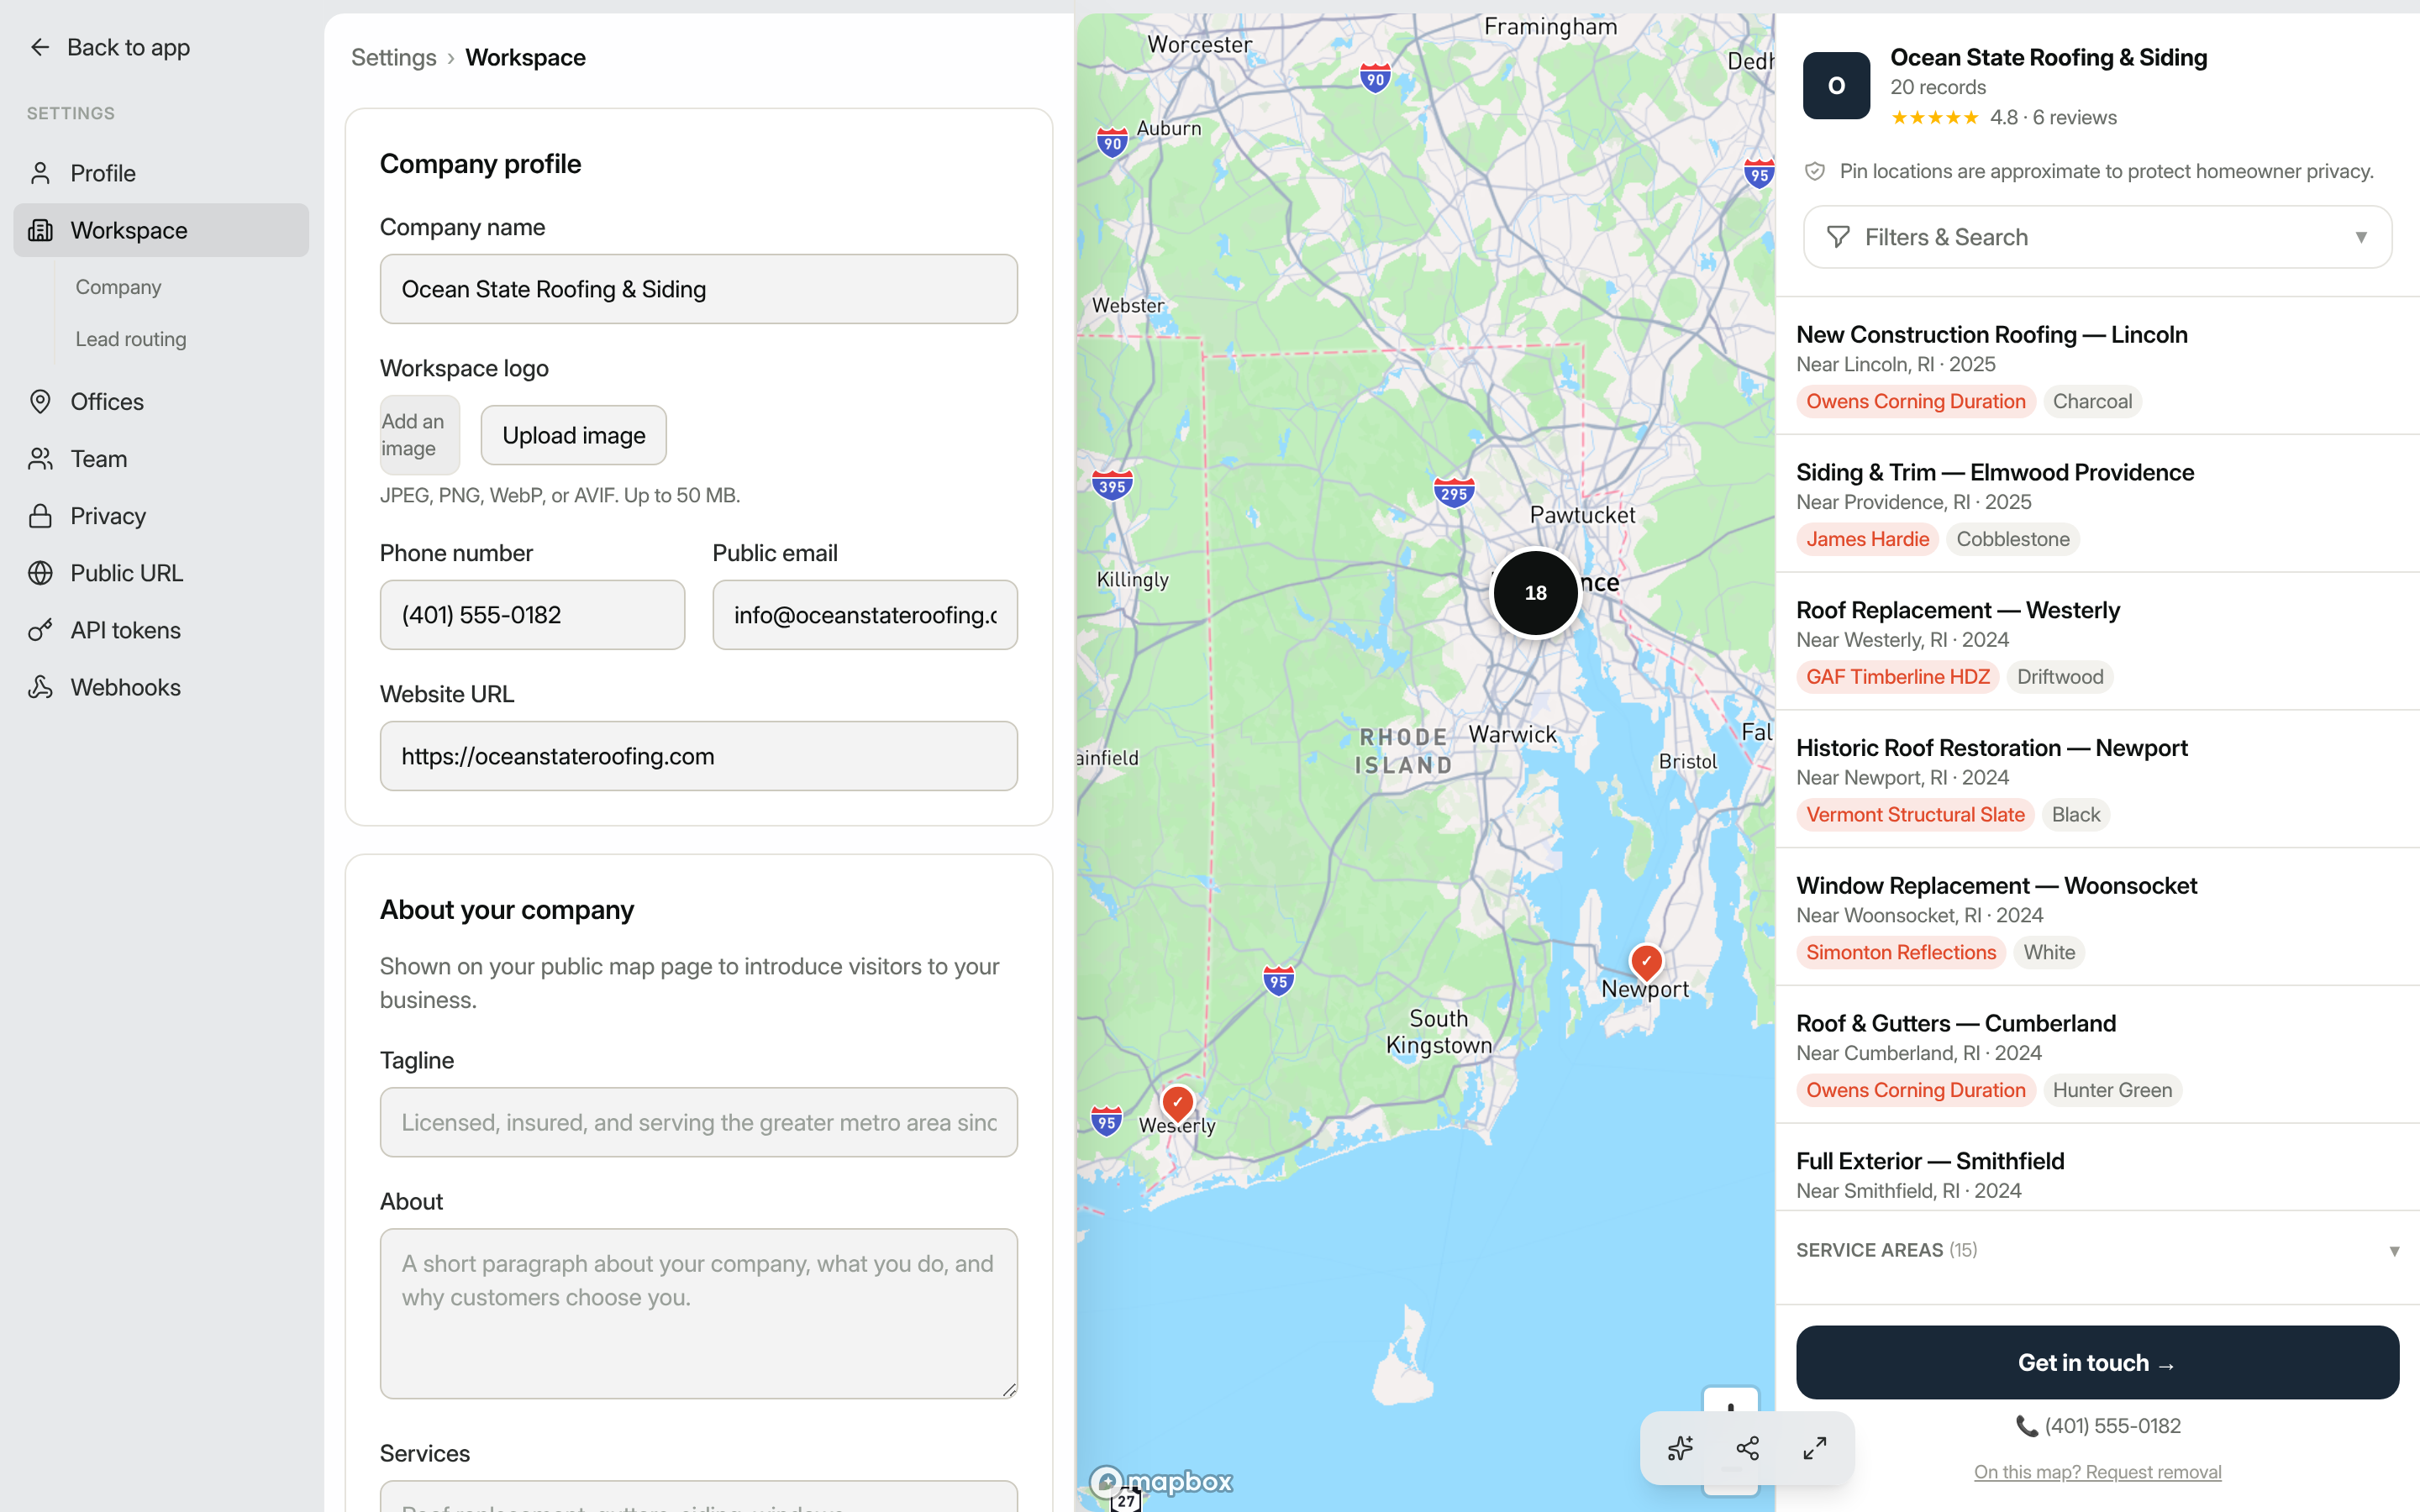
- In the sidebar, click Settings, then click Workspace.
- Under the Company profile card, edit Company name, Phone number, Public email, and Website URL.
- To add or replace your logo, click Workspace logo and upload a JPEG, PNG, WebP, or AVIF file (up to 50 MB). The logo updates immediately without requiring a separate save.
- Scroll down to the About your company card to fill in a Tagline, About paragraph, Services list, and FAQ, which appear on your public map page.
- Click the save button at the bottom of the form to apply your changes.
Tip: Map-specific branding (theme colors, pin styles, and splash screens) is configured per map, not here. Open a map under Maps to adjust those.
Set your lead notification email
If you want all new leads from your maps to be forwarded to a single address (for example, a shared team inbox), add it in Workspace settings under Lead routing → Notification email. Individual team members can separately opt in or out of lead emails from their own Profile settings.
Route leads to the right person (Growth and Network)
On Growth and Network you can add routing rules under Workspace settings → Lead routing. Each rule sends a lead's notification to specific people based on the matched record:
- Give the rule a name (for example, "West-coast leads").
- Choose what to match on (record type, region (state), or a custom field) and the value to match, or pick "matches any" for a catch-all.
- Enter one or more Send to email addresses.
Rules run top to bottom and the first match wins. If no rule matches a lead, it falls back to your default notification email (and the record's office email). You can pause a rule without deleting it. Routing applies to leads from your public maps and from the API.
Invite team members
- Go to Settings → Team.
- In the Invite a team member section, type the person's email address.
- Choose a role from the dropdown:
- Admin: manage records, leads, and settings (no billing access)
- Editor: add and edit records only
- Guest: view-only access
- Click Send invite. The person receives an email with a link to join your workspace.
Pending invitations appear in the Pending invitations section. You can resend or cancel any invitation from there. Once someone accepts, they appear in the Members list where you can change their role or remove them at any time. The workspace owner role cannot be reassigned from this screen.
Serve your map on your own domain (Growth and Network)
On Growth and Network you can connect a custom domain so your public map lives at your own address (for example, maps.yourcompany.com) instead of a sawyoursign.com URL. Go to Workspace settings → Custom domain:
- Enter the subdomain you want to use and click Connect.
- Add the two DNS records shown (a TXT record that proves ownership and a CNAME that points the domain at your map) at your domain provider.
- Click Verify DNS. DNS can take a few minutes to propagate; once the TXT record is found, the domain goes live.
- Add the same domain in your hosting dashboard so its SSL certificate is issued.
You can disconnect a domain at any time, which returns your map to its sawyoursign.com address.
View your plan and usage
Go to Settings → Billing to see your current plan name and status, how many published records you have relative to your plan limit, and total leads captured.
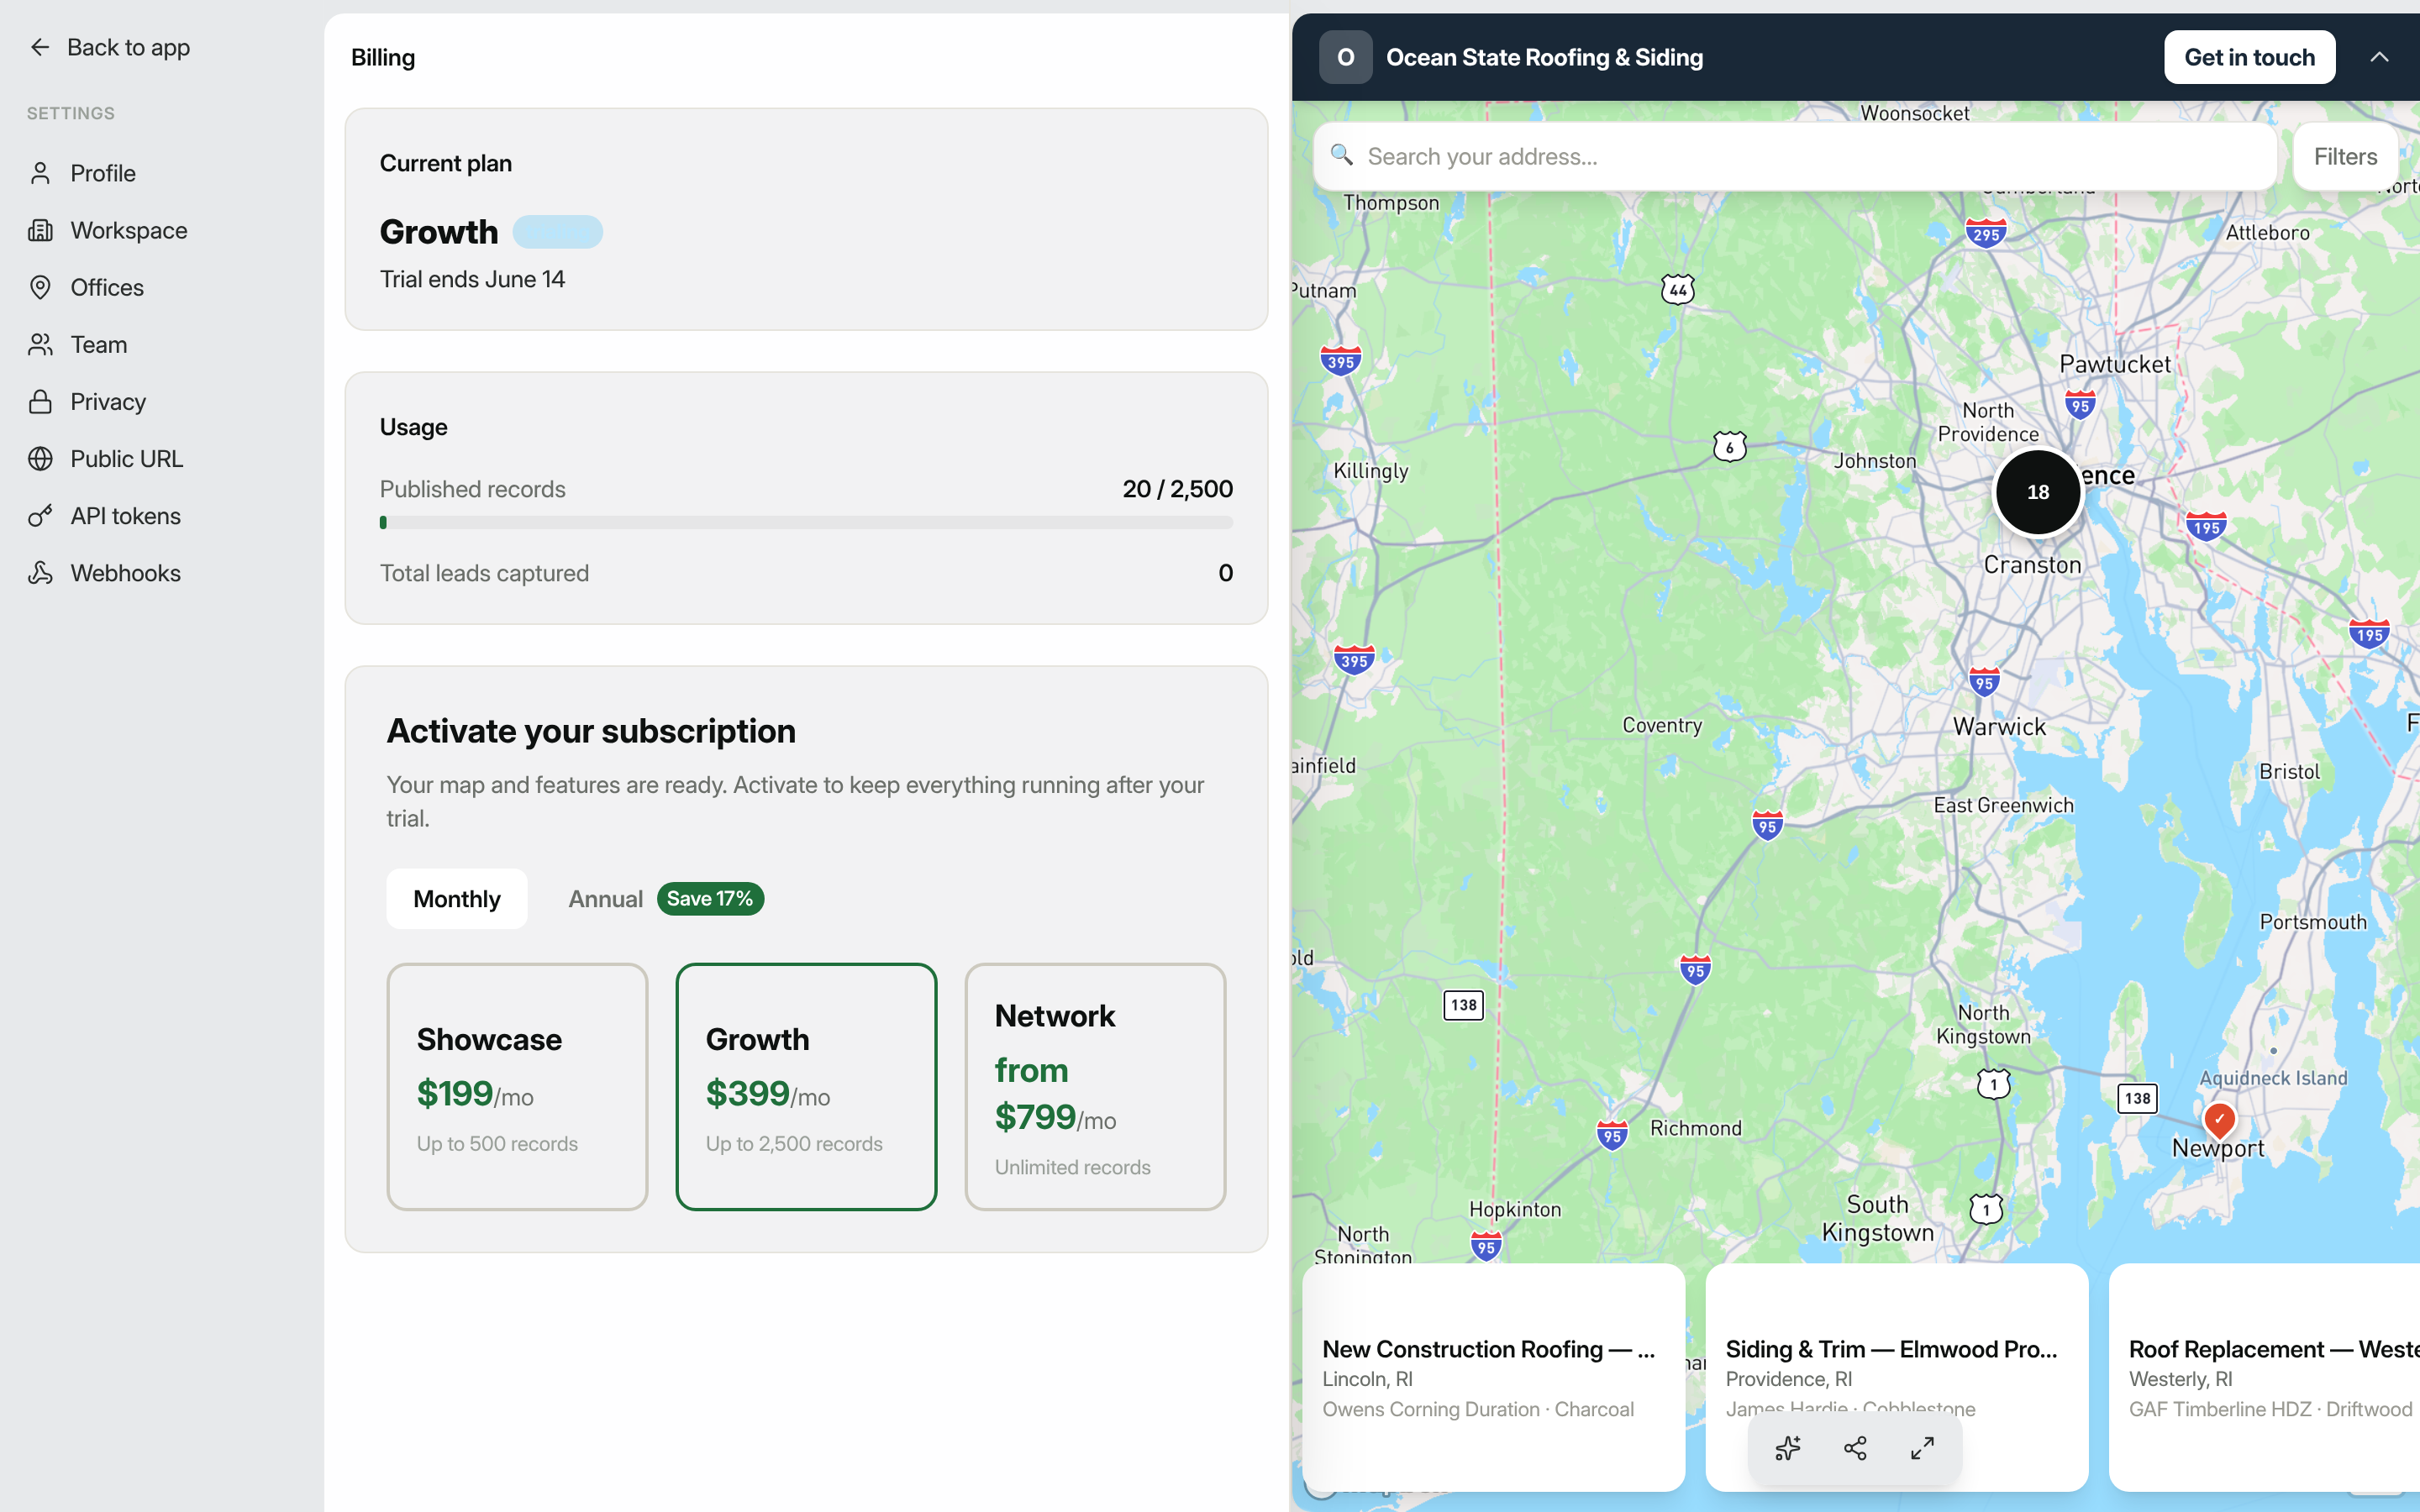
Each plan caps how many published records you can have (500 on Showcase, 2,500 on Growth, unlimited on Network). Drafts are always free; the limit only applies when you publish. If you hit your plan's published-record limit, publishing is blocked until you upgrade or unpublish a record.
Manage or change your subscription
If you have an active subscription or are currently on a trial, a Manage billing button appears on the Billing page (provided your workspace has a Stripe customer record). Clicking it opens the Stripe customer portal where you can update your payment method, download invoices, or cancel your subscription.
If your subscription is not yet active, the Billing page shows the available plans (Showcase, Growth, and Network) with monthly and annual pricing. Select Monthly or Annual, then click a plan card to start checkout.
Save by paying annually. Choosing Annual applies a standing discount (about 17%, roughly two months free) versus paying month to month, and the discount stays on every yearly renewal. The savings are shown on the billing toggle and the pricing page.
If your trial is ending soon, your payment is past due, or your subscription has been canceled, a banner appears at the top of the dashboard with a Go to billing link so you can resolve the issue quickly. While a workspace is past due or canceled it becomes read-only: your public map stays live and you can still view and export your data, but you can't add or publish records until you reactivate.
For personal account details (your name, email address, profile picture, and password), see Settings → Profile. For help setting up your public map, see Building a map.