Getting started with Saw Your Sign
A quick tour of your workspace: the sidebar, where everything lives, and what to set up first.
Welcome to Saw Your Sign. This guide gives you a quick tour of your workspace so you know where everything lives, then points you to what to set up first.
Signing in
Head to the login page and enter the email and password you chose when you created your account. You'll land on your dashboard, the home base for everything you build.
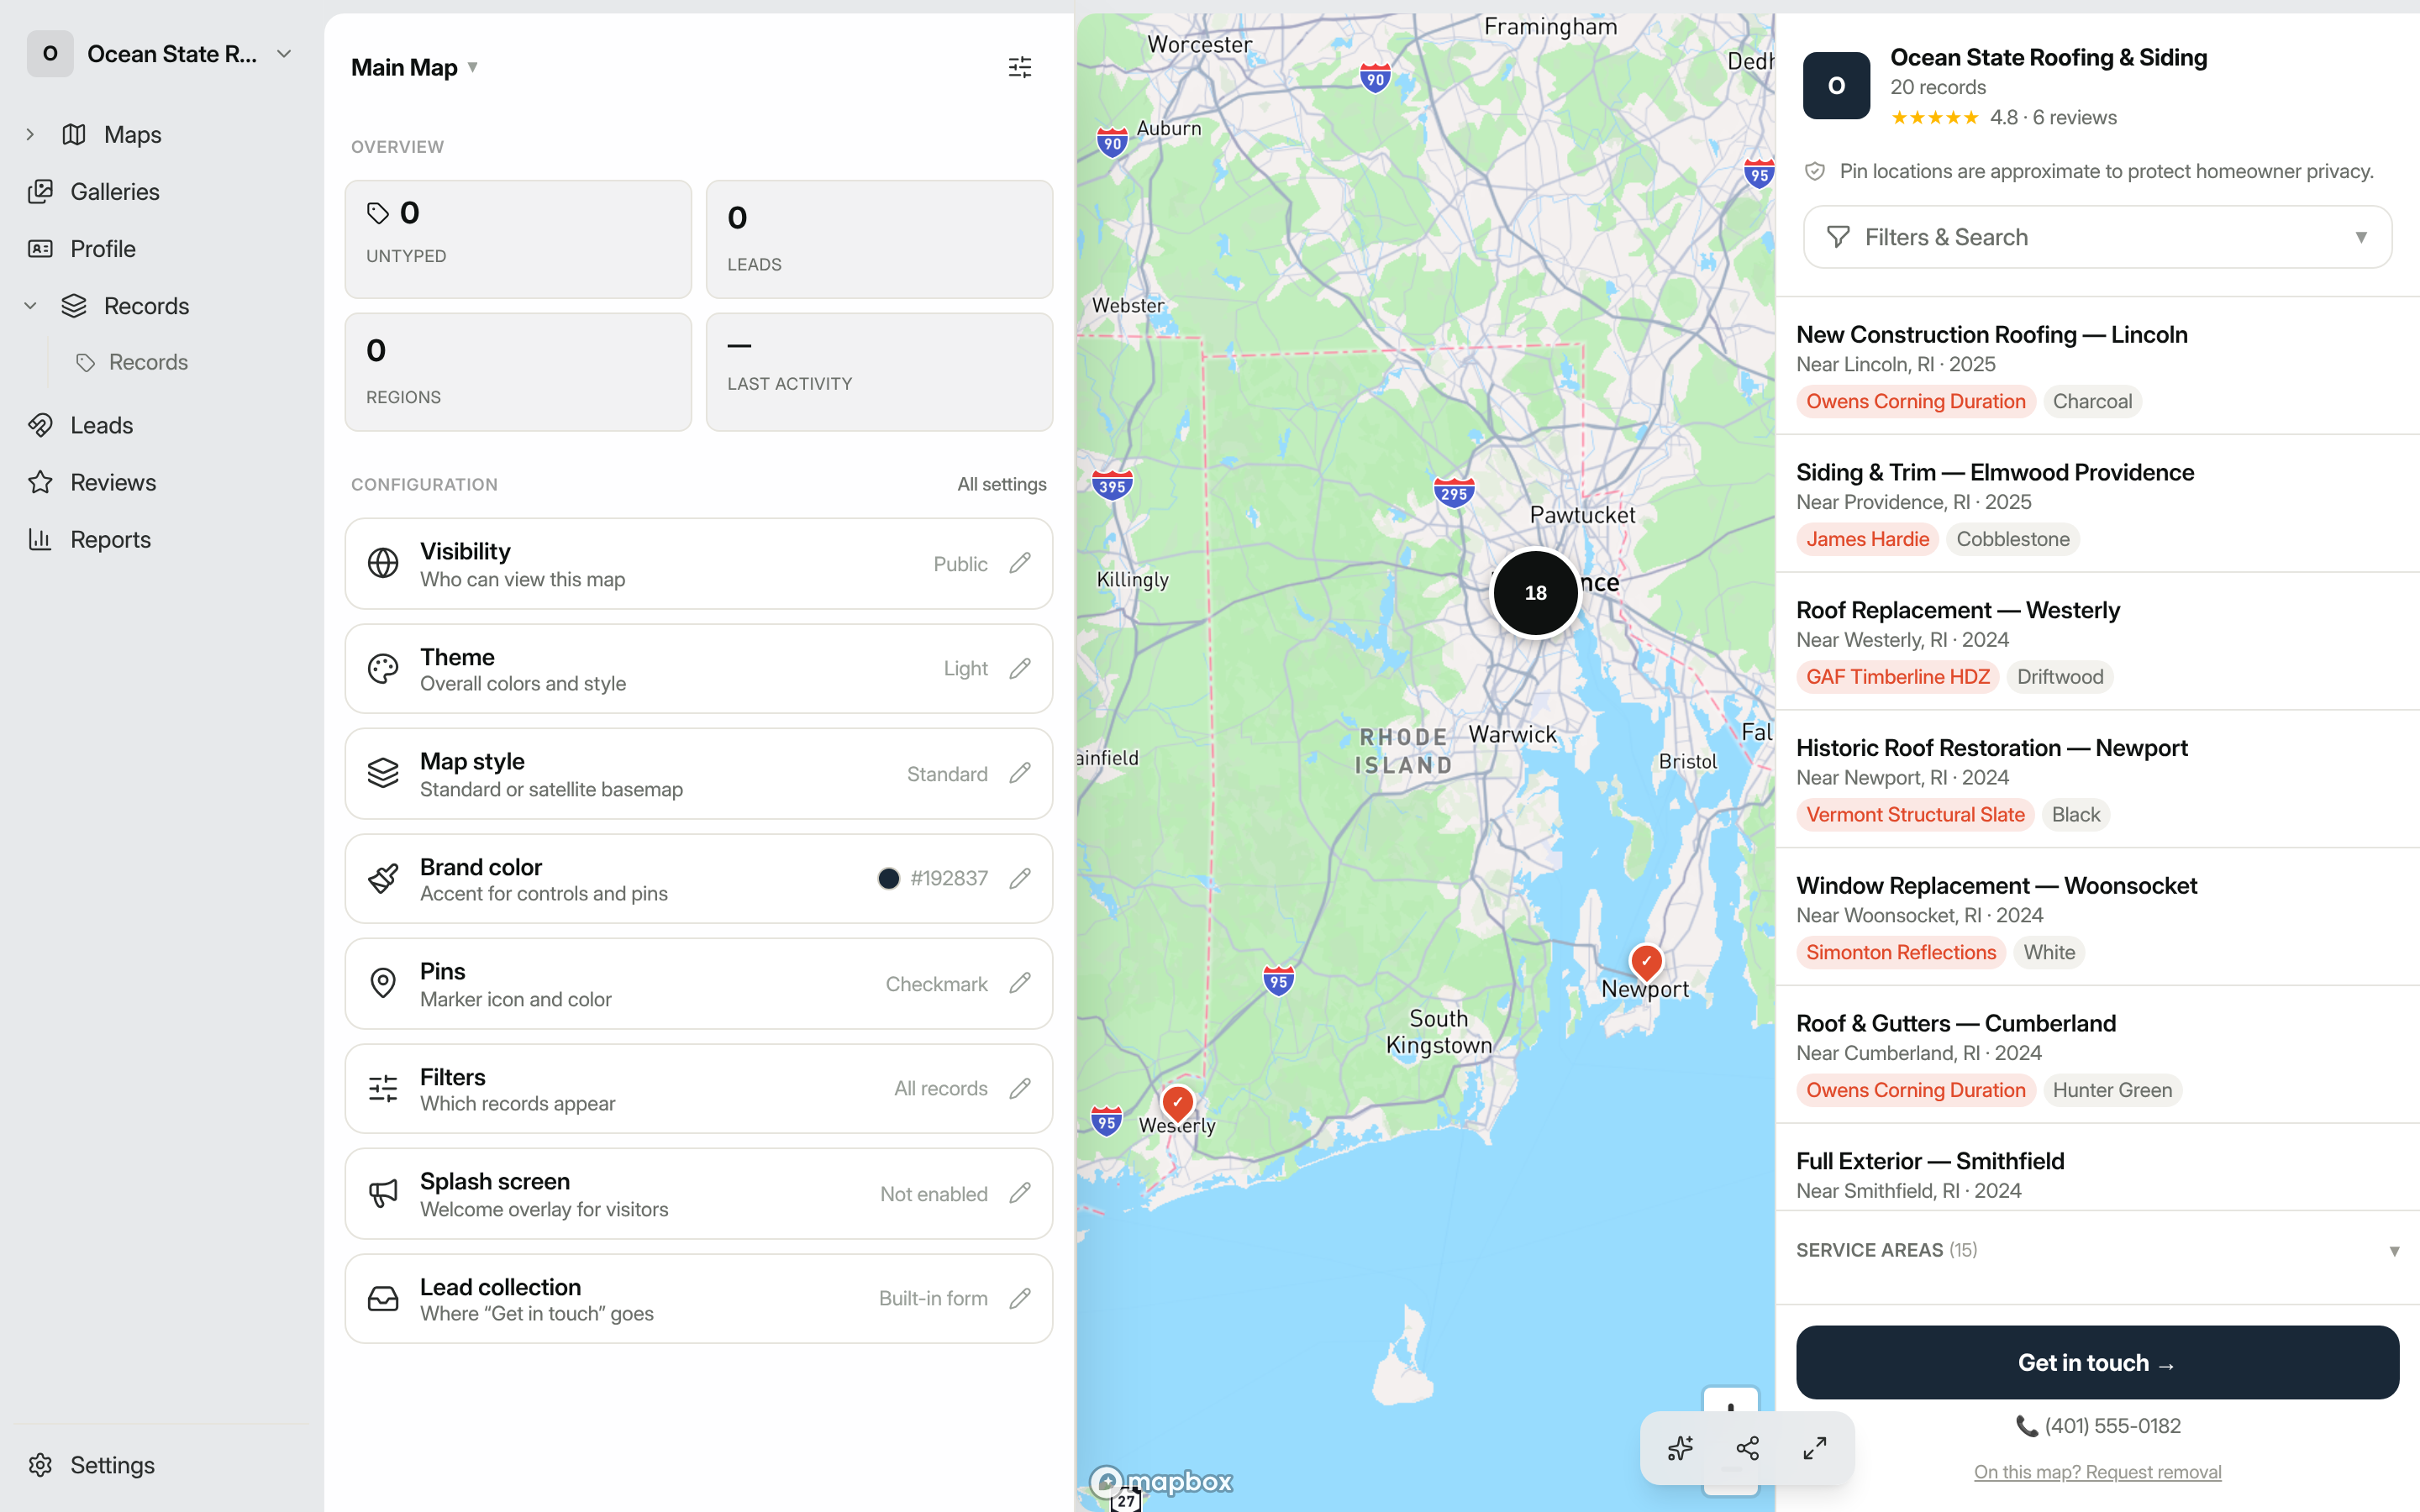
The sidebar
Everything in Saw Your Sign is reachable from the navigation rail on the left. Here's what each section is for:
- Maps: your customer-facing maps. Each saved map is a published, shareable view of your records. Expand it to jump straight to a specific map.
- Galleries: shareable photo and media galleries, a visual companion to your maps.
- Profile: your public "About" page, where customers learn who you are.
- Records: the jobs, listings, members, or places that become pins on your maps. Expand it to filter by a specific record type.
- Leads: messages from people who found you through a public map. A badge shows how many are unread.
- Reviews: request, manage, and publish customer reviews.
- Reports: a summary of your activity.
- Settings: your workspace details, team, billing, and more.
The button at the very top of the rail shows your workspace name. Click it to switch workspaces, manage your account, or sign out.
When you open a multi-section area (Settings, a map's or gallery's settings, or Reviews), the rail switches to that area's own list of sections, with a link at the top to step back out. The breadcrumbs across the top of every page show where you are and let you jump back to a parent at any time.
How pages are laid out
Records, Leads, Reviews, and Reports share the same shape: a list on the left and a wide work area on the right. Pick something in the list and it opens on the right without leaving the page:
- In Leads and Reviews, the right side shows the full message or review, where you set its status, add private notes, or write a public reply.
- In Records, selecting a record opens its editor on the right while the list stays in place, so you can move from one record to the next quickly. Saving drops you back to the overview with the list refreshed.
- With nothing selected, the right side shows an at-a-glance overview of the section: your lead pipeline, your ratings, or your records on a mini-map.
What to set up first
A great public map is built in three steps. We recommend working through them in order:
- Add your records. Maps are built from records, so start here. See Adding records, or if you already have a spreadsheet, Importing records from a spreadsheet.
- Build a map. Once you have records, build your first map and customize how it looks.
- Share it. When you're happy with it, publish and embed your map on your website.
From there you can capture leads from visitors and collect reviews to build trust.
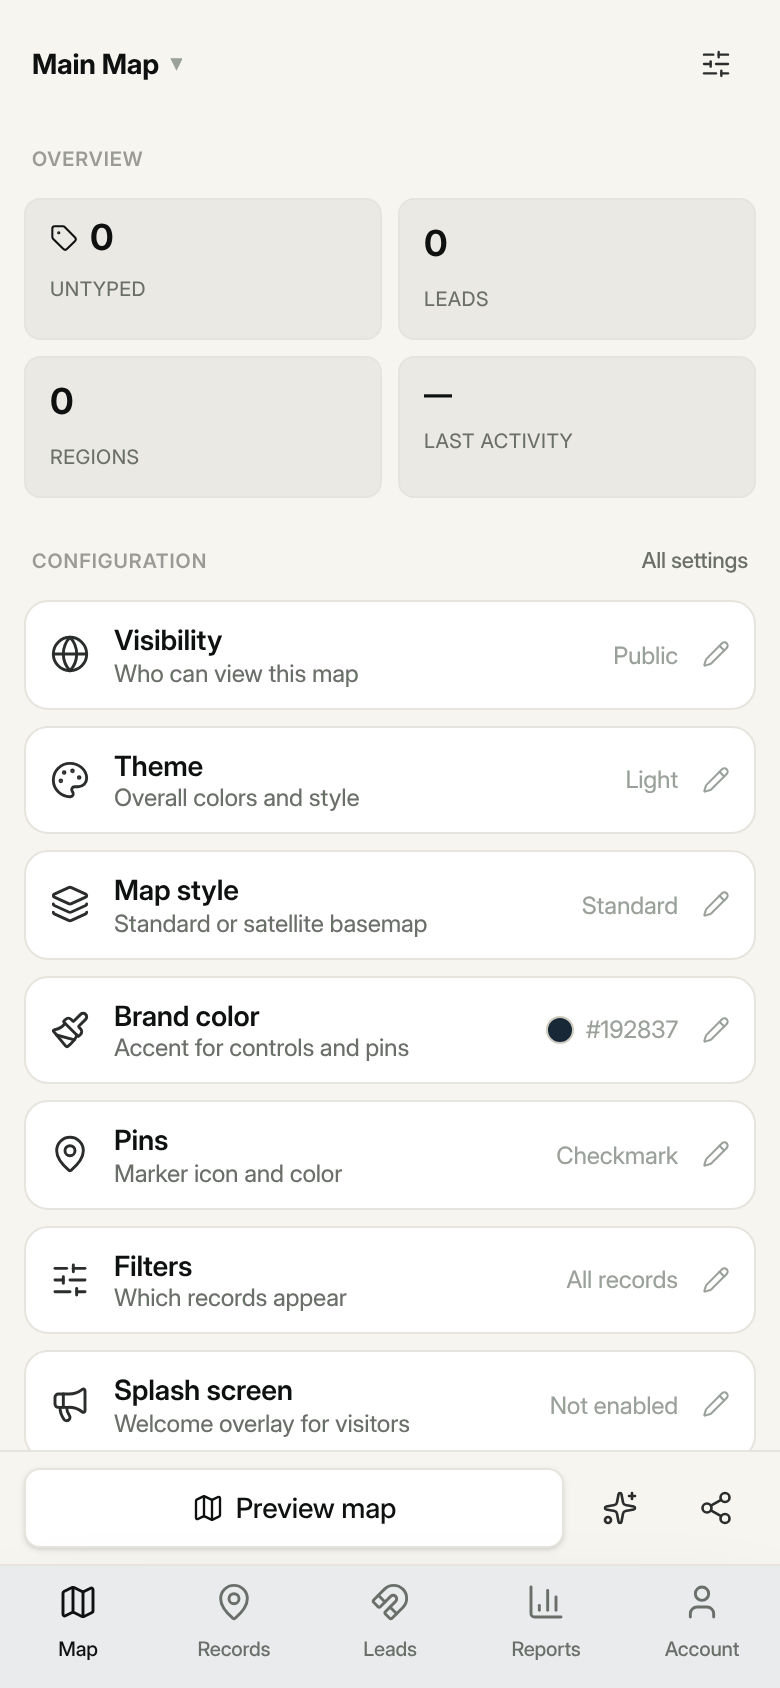
On your phone
The dashboard works on your phone too. The left rail becomes a bottom tab bar with Map, Records, Leads, Reports, and Account. Tap Account to reach everything else (Settings, Saved maps, Galleries, Reviews, and your public profile), along with the workspace switcher and sign-out.
Every screen leads with the page itself, filling your phone. On the map tab you start on your map's details and controls; a bar above the tabs lets you Preview map (it drops the page to show your live map, then reads Show details to bring it back), open the AI Assistant, or Share your map. The list screens (Records, Leads, Reports) just fill the screen, with no map in the way. Tap any item in a list to open its details full-screen; a Back button at the top returns you to the list.
Tip: Saw Your Sign saves your work as you go. There's no separate "save" step for most changes. Edits to records and map settings apply right away.