Importing records from a spreadsheet
Bulk-add records by uploading a CSV and matching its columns to your fields.
If you have existing job history in a spreadsheet, you can bring it into sawyoursign all at once instead of entering records one by one. The CSV importer has two steps: upload your file, then match its columns to your fields.
Get to the import screen
- In the left navigation, click Records.
- Open any record type list (for example, Jobs).
- In the top-right corner, click Import CSV.
You can also go directly to /dashboard/records/import.
Prepare your spreadsheet
Export your spreadsheet as a CSV file. Any spreadsheet app (Excel, Google Sheets, Numbers) can do this from File → Download or File → Export.
The importer accepts up to 500 rows per file. Want a head start on the column format? On the upload screen, click Download a template CSV to get a ready-to-use example.
Upload your file
On the import screen you will see a large drop zone. Either:
- Drag your CSV file onto the drop zone, or
- Click the drop zone to open your file browser, then select the file.
The importer reads your file right away and takes you to the column mapper.
Match your columns to fields
This is where the importer shows each column from your spreadsheet side by side. Under every column you will find the heading from your file, a dropdown to choose which field it fills, and a preview of that column's value.
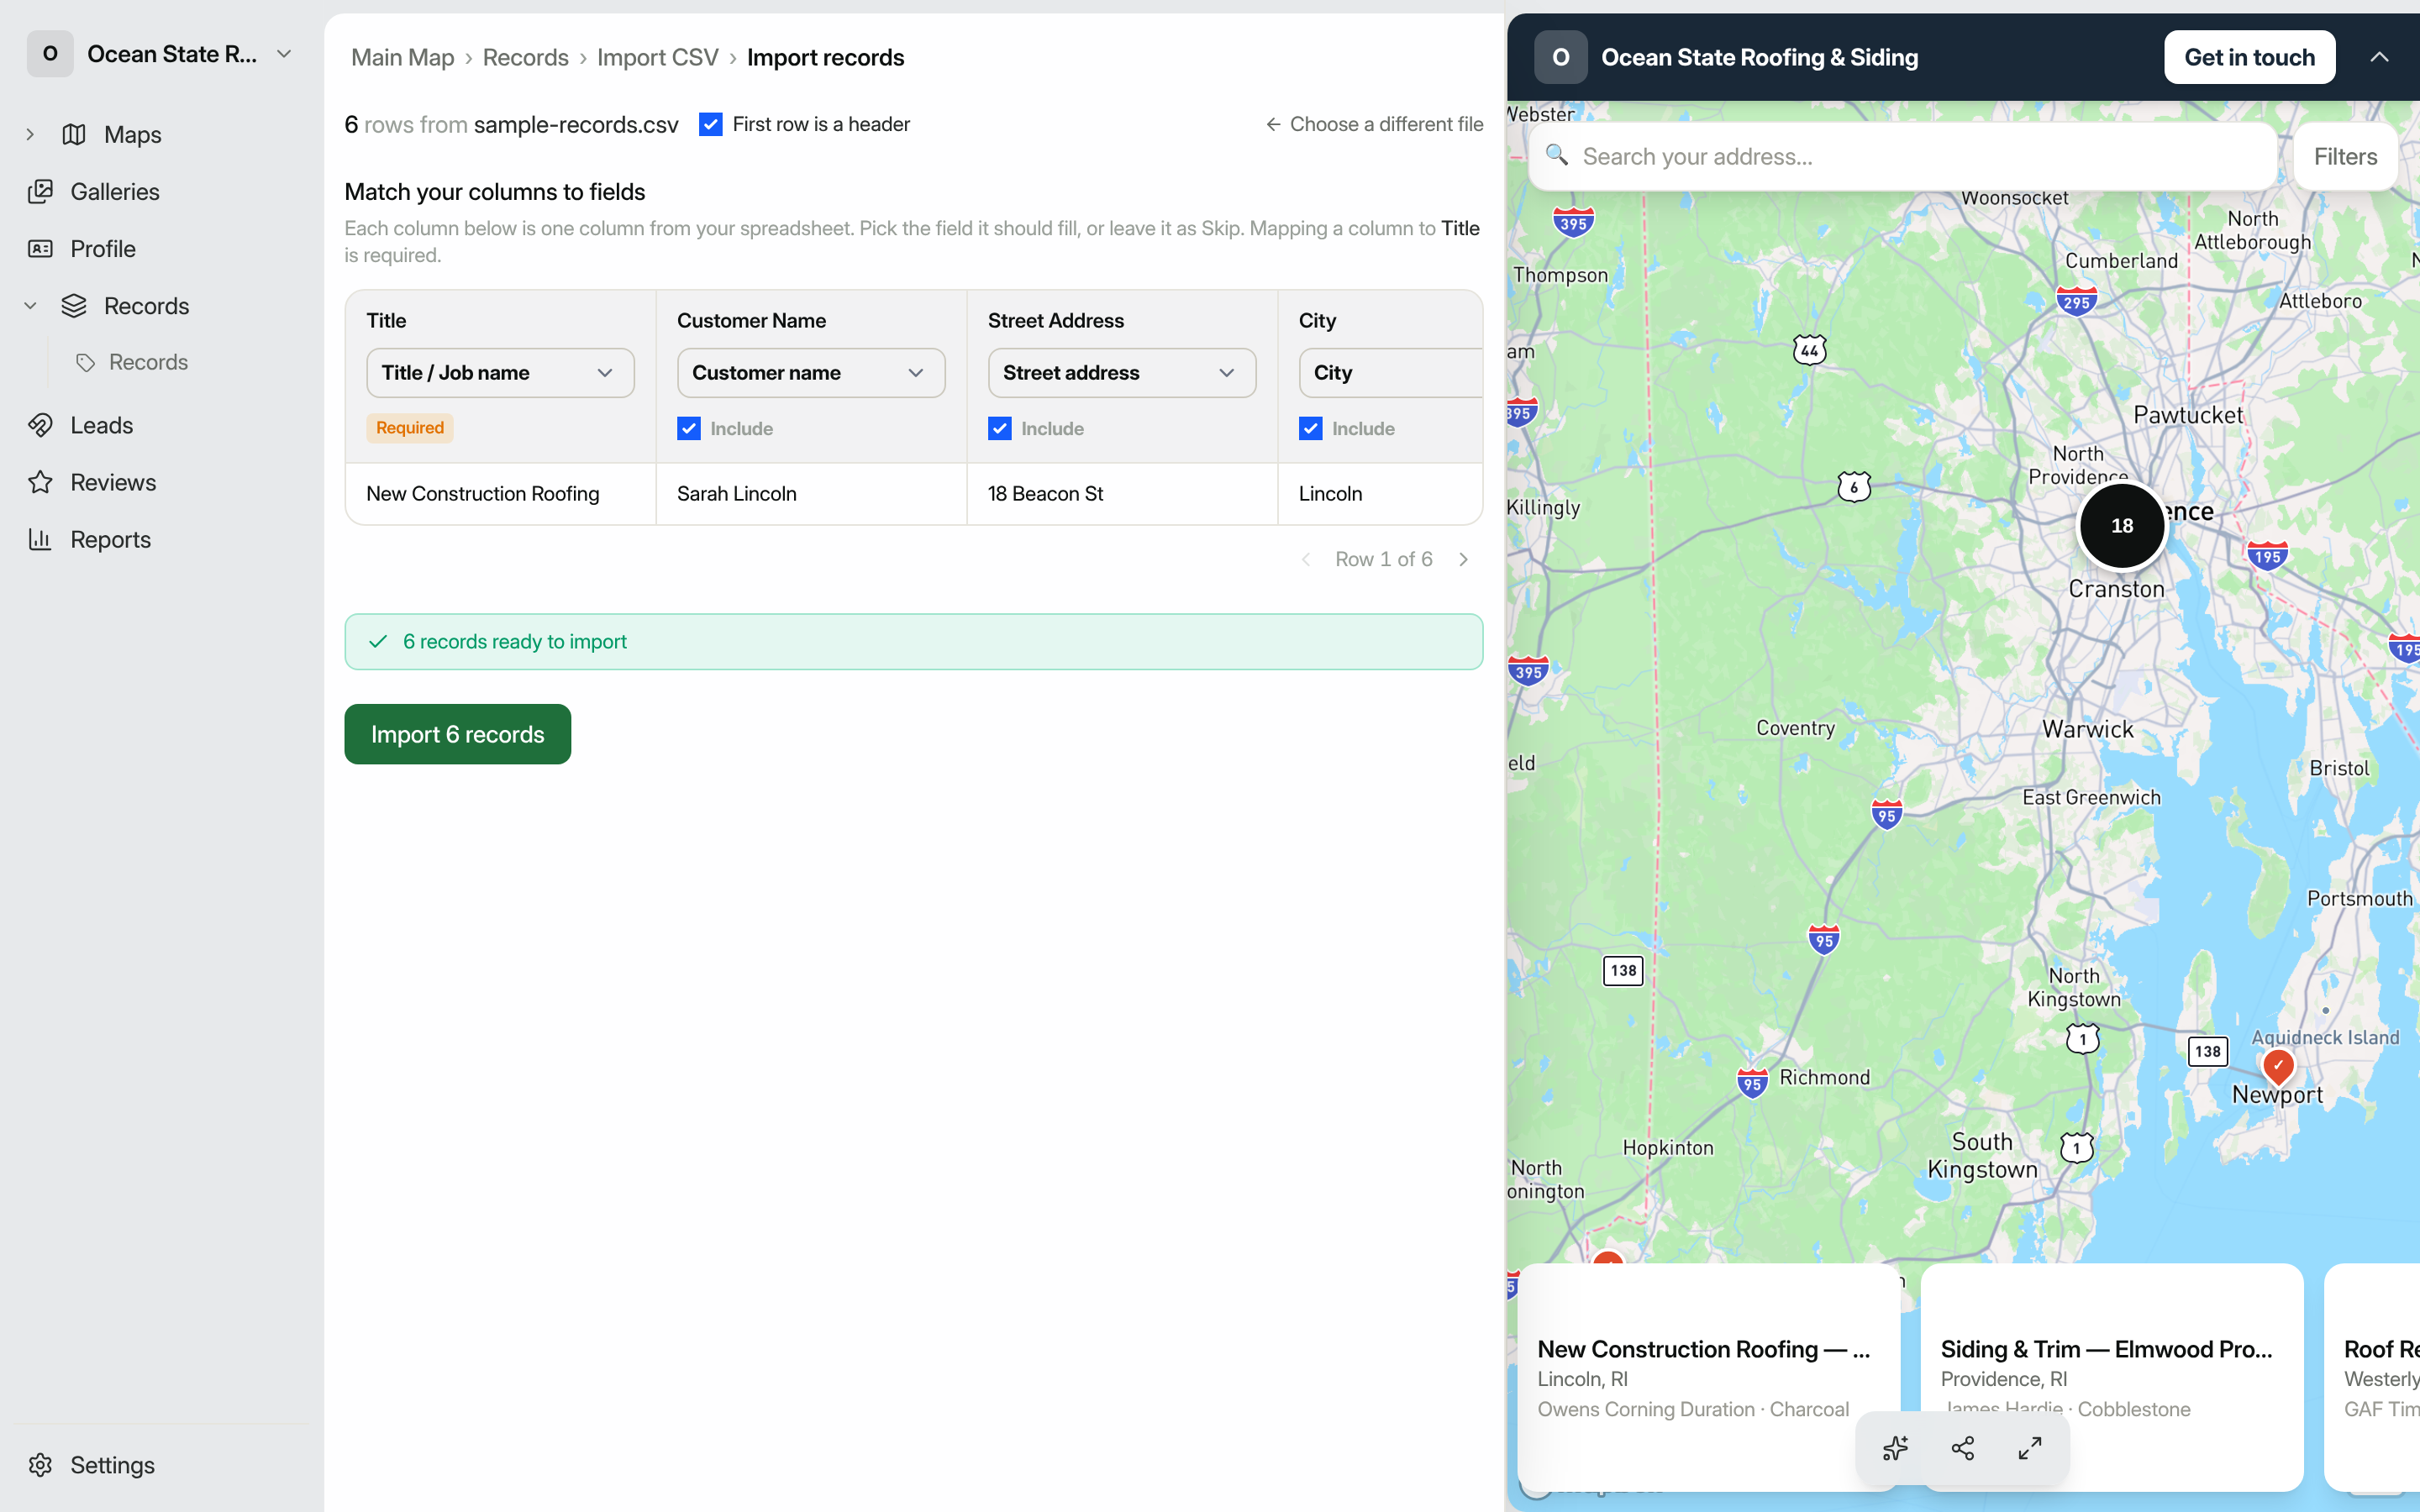
Work through the screen top to bottom:
- First row is a header. sawyoursign guesses this for you and turns the toggle on when your first row looks like column names. Flip it off if your data starts on the very first row.
- Pick a field for each column. Each dropdown groups the fields into Basics, Location, and Details. Choose the field a column should fill, or leave it on Skip this column. A field can only be used once, so picking it for one column removes it from the others.
- Include or skip. Every mapped column is included by default. Untick Include on any column you want to leave out. The one column you map to Title is always required and stays marked Required.
- Preview your rows. The row under the headings shows real values from your file. Use the arrows and the Row X of N counter to step through and confirm the mapping looks right.
If you have more than one record type, an Import as record type selector appears at the top. Pick the type that matches your data.
A few fields behave specially:
| Field | Notes |
|---|---|
| Title / Job name (required) | Every record needs a title. Rows without one are skipped. |
| Street address, City, State, ZIP / Postal code | Used to place the record on your map. |
| Date | Accepts formats like 2024-06-15. |
| Status | Set to published to make records live immediately. Any other value creates drafts. |
Run the import
A status bar at the bottom keeps a live count: once a column is mapped to Title, it turns green and reads N records ready to import. When it does, click Import N records.
After the import finishes you will see a summary (for example, "24 records imported") along with any rows that were skipped or caused errors. Click View records to see what came in, or Import another file to run another batch.
Tip: You can add or edit records one at a time from the record list too. See Adding records for the single-record flow.